Easy Punch Card Designs
- Machine Knitting Showcase

- Mar 2, 2022
- 3 min read
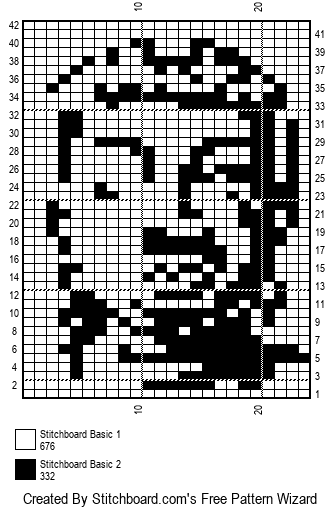
I recently let out my inner Star Trek Geek and created a punch card of Mr Spock. It was a fairly basic procedure to do this but involved a bit of tweaking for the final result.
I would like to share an easy way of creating basic shapes / pictures using simple clip art available free online from many sites and a couple of free online programs.
The first thing to remember is that your punch card is only 24 stitches wide so it doesn't lend itself to complicated patterns. But never fear, you can achieve a good result using just 2 colours and a basic picture. Obviously, if you have a super dooper electronic knitting machine then the world is your mollusc 😉
First of all decide what picture you would like and get on Google and search for e.g. 'Free Rabbit Clip art'
You will get a multitude of results. Look for something that is a basic design in black and white. Choose a silhouette or a plain black and white image. Be aware that floats could be an issue if there is a lot of fill in one colour. I find the semi outlined pictures seem to work best but you must be prepared to either hook up your floats, add extra stitches to the pattern to break up the floats or line your garment/item.
I am going to take for example, exhibit one: A rabbit

This is a good picture to use as it has a good outline and not too much detail. The downside of this image is that it is in a PNG format which will not work with the intended online program so you would have to convert it to a JPG or GIF format. (Don't panic Mr. Mannering, it's a doddle).
The way to find out what file format it is in is to hover your mouse over the downloaded image file. If it says in this case rabbit.png it needs converting. If it says rabbit.jpg or rabbit.gif you are good to go. To convert your downloaded image you either need to open it in Paint program on your PC and select save as and choose jpg as the file extension or, if you don't have Paint go to your best friend Google and search for 'convert png to jpg online free' and you will generally get a hit on quite a few online convertors.
Right! You have your picture at the ready, you know where it is on your computer, what you called it and it's in the right file format YES? 😁
Now get on the world wide wonderweb and type in stitchboard.com
This is by far the best stitch creator I have found on the internet. If you know of any better ones then please let me know as I will update the blog.
You will see a set of 9 steps to create a pattern. Here are some screenshots:
Step 1: Upload your image. Select choose file and find the image on your computer. Step 2: In stitching category select knitting.
Step 3: Select standard. Step 4: Standard shape.
Step 5: Black and White.
Step 6: Change stitch count to 24.
Step 7: I leave as bumped together. Step 8: Leave as it is.
Step 9: Click 'Lets see my pattern'.

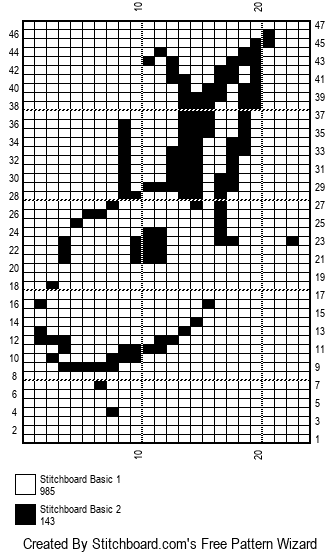
As you can see, the result is fairly good one this image. You can now choose to download the image or print straight from screen. As you can see, the result is missing a few pixels from the original so you now need your pencil and start a bit of colouring in. To break up the knitting floats on the above you can add extra punch holes or even little flowers. Or, as I said earlier, a lining will hide all loose floats. There is a very good video of how to knit linings on Kalamunda Crafts here
Please remember that not all clip art and pictures will produce good patterns. It's a case of hit and miss but it doesn't take long to do and it gives you a good basis to get creative and get your colouring head on 😊


Comments